Friday 21 September 2018

Dynamically Creating Components Part 1:- createComponents


You Can create the Dynamic Component in Clint Side with javaScript using "$A.createComponent()".  If you want to create multiple component together then use "$A.createComponents()".

"$A.createComponent()" accept the three parameters. Please check this post for more detail.
1) Type
2) Attribute
3) CallBack (cmp, status, errorMessage)

Syntax :-

$A.createComponent( String type, Object attributes, function callback )


Use Case:- Create a new button onclick on existing button. And Destroying Dynamically Created Components.
Solution:- We can do the same with the help of "$A.createComponent()".

Sample Code.

CreateComponentDemo

<aura:component >
    <aura:attribute name="IsBottonVisible" type="boolean" default="false"/>
    <lightning:button variant="brand" label="Create New Button"
                      title="Create New Button" onclick="{! c.CreateNewButton }" />
    <BR/><BR/>
        <p>Dynamically created button</p>     <BR/><BR/>

        {!v.body}

</aura:component>

NOTE:- I created IsBottonVisible Attribute to avoid creating multiple Button.


CreateComponentDemoController

({
    CreateNewButton : function(component, event, helper) {
        var isButtonVisible = component.get("v.IsBottonVisible");
        if(isButtonVisible == false){
            $A.createComponent(
                "lightning:button",
                {
                    "aura:id": "UniqueAuraId",
                    "label": "Destroy Me",
                    "onclick": component.getReference("c.DestroyMe")
                },
                function(newButton, status, errorMessage){
                    if (status === "SUCCESS") {
                        var body = component.get("v.body");
                        body.push(newButton);
                        component.set("v.body", body);
                        isButtonVisible= true;
                        component.set("v.IsBottonVisible", isButtonVisible);
                    }
                    else if (status === "ERROR") {
                        console.log("Error: " + errorMessage);
                    }
                }
            );
        }      
    },

    DestroyMe : function(cmp) {
        // Find the button by the aura:id value
        console.log("button: " + cmp.find("UniqueAuraId"));
        var comp = cmp.find("UniqueAuraId")
        comp.destroy();
        cmp.set("v.IsBottonVisible", false);
    }

})


CreateComponentDemoApp
<aura:application extends="force:slds">
    <c:CreateComponentDemo/>
</aura:application>

Result:-


 Please check our old post on Lightning :-
 
1) Invoke Apex from Lightning Component 

2) Design Resource In Lightning Component Bundle
3) Component Event in Lightning Component | aura:event
4) Modal/Popup in Lightning Component


Feel free to post your feedback or question.


Thanks,
Amit Chaudhary

Capture.JPG  @amit_sfdc    #SalesforceApexHours    @ApexHours
  Salesforce Apex Hours 
 

Wednesday 12 September 2018

Modal/Popup in Lightning Component


In this post we will talk about how to create modal/Popup in Lightning Component.

Problem :- How to open popup on button Click

Here is Solution :) 

/* ModelDemo */

<aura:component >
    <aura:attribute name="ShowModule" type="boolean" default="false"/>  
    <lightning:button variant="success" label="Open popup" title="Open popup"
                                        onclick="{!c.ShowModuleBox}" />
  
  
    <aura:if isTrue="{!v.ShowModule}">
        <!--
            I Used SLDS for this code
            Here is link https://www.lightningdesignsystem.com/components/modals/
        -->      
        <div class="demo-only" style="height: 640px;">
            <section role="dialog" tabindex="-1" aria-labelledby="modal-heading-01" aria-modal="true" aria-describedby="modal-content-id-1" class="slds-modal slds-fade-in-open">
                <div class="slds-modal__container">
                    <header class="slds-modal__header">

                        <lightning:buttonIcon iconName="utility:close" variant="bare" onclick="{! c.HideMe }"
                                              alternativeText="Close" class="slds-modal__close" />

                        <!--   
                        <button class="slds-button slds-button_icon slds-modal__close slds-button_icon-inverse" title="Close">
                            You Can add Button Icon Here if you want
                            <svg class="slds-button__icon slds-button__icon_large" aria-hidden="true">
                                <use xmlns:xlink="http://www.w3.org/1999/xlink" xlink:href="/assets/icons/utility-sprite/svg/symbols.svg#close" />
                            </svg>
                            <span class="slds-assistive-text">Close</span>
                        </button>
                       -->
                        <h2 id="modal-heading-01" class="slds-text-heading_medium slds-hyphenate">Modal Header</h2>
                    </header>
                    <div class="slds-modal__content slds-p-around_medium" id="modal-content-id-1">
                        <p>Salesforce Apex Hours</p>
                    </div>
                    <footer class="slds-modal__footer">
                        <button class="slds-button slds-button_neutral">Cancel</button>
                        <lightning:button variant="brand" label="Hide Me" title="Hide Me" onclick="{! c.HideMe }"/>
                    </footer>
                </div>
            </section>
            <div class="slds-backdrop slds-backdrop_open"></div>
        </div>
      
    </aura:if>  
  
</aura:component>


Please check Salesforce documentation for Button Icon .
Please check Salesforce documentation for Model  . 

/* ModelDemoController */

({
   HideMe: function(component, event, helper) {
      component.set("v.ShowModule", false);
   },
   ShowModuleBox: function(component, event, helper) {
      component.set("v.ShowModule", true);
   },
})


/* DemoApp */

<aura:application extends="force:slds">
    <c:ModelDemo/>
</aura:application>

Result :-


If you want to learn about Lightning Component. Please check our old post
1) Component Event in Lightning Component | aura:event
2) Invoke Apex from Lightning Component
3) Design Resource In Lightning Component Bundle


Thanks,
Amit Chaudhary
Capture.JPG  @amit_sfdc    #SalesforceApexHours    @ApexHours
  Salesforce Apex Hours


Thursday 6 September 2018

Component Event in Lightning Component | Lightning Component Communication With EVENT | aura:event


In this post we will talk about Component Event in Lightning Component. To use Component Event we need to perform below steps

1) Create Event Component 

2) Register the Event ( in Child Component )


3) Fire the Event ( from Child Component)


4) Handle the Event (In Parent Event)


Here is Code For you 


Component Event
AccEvent
<aura:event type="COMPONENT">
    <aura:attribute name="AccRecord" type="Account"/>
</aura:event>

Notifier Component
<!-- c:AccNotifier -->
<aura:component>
    <aura:attribute name="newAccount" type="Account"
              default="{ 'sobjectType': 'Account','Name': 'Test Name'}"/>
    <aura:registerEvent name="cmpAccEvent" type="c:AccEvent"/>
    <p>
        <form class="slds-form--stacked">        
            <lightning:input aura:id="newAccountform"
                            label="Account Name" name="AccAction"
                            value="{!v.newAccount.Name}" />

            <lightning:button label="Add Acc"
                            class="slds-m-top--medium"
                            variant="brand"
                            onclick="{!c.fireComponentEvent}"/>
        </form>
    </p>
</aura:component>
/* AccNotifierController */
({
    /* AccNotifierController */
    fireComponentEvent : function(cmp , event) {
        var cmpEvent = cmp.getEvent("cmpAccEvent");
        // Get the value from Component and set in Event
        cmpEvent.setParams( { "AccRecord" : cmp.get("v.newAccount") } );
        cmpEvent.fire();
    }
})

Handler Component

<aura:component>
    <aura:attribute name="AccListFromEvent" type="Account[]"/>  
    <!-- Note that name="cmpAccEvent" in aura:registerEvent in AccNotifier.cmp -->
    <aura:handler name="cmpAccEvent" event="c:AccEvent" action="{!c.handleComponentEvent}"/>        <!-- handler contains the notifier component -->
    <c:AccNotifier />
    <!-- Disply Record -->
    <div>
        <lightning:card title="List Account">
            <p class="slds-p-horizontal--small">
                <aura:iteration items="{!v.AccListFromEvent}" var="acc">
                    <br/>
                    {!acc.Name}
                </aura:iteration>
            </p>
        </lightning:card>
    </div>
</aura:component>

/* AccHandlerCMPController.js */


({
     /* AccHandlerCMPController.js */
    handleComponentEvent : function(cmp, event) {
        // Get value from Event
        var accRec = event.getParam("AccRecord");
        // Get the List of Existing Account ListOfAcc
        var ListOfAcc = cmp.get("v.AccListFromEvent");
        // Add Record in List
        ListOfAcc.push(accRec);
        // set the handler attributes based on event data
        cmp.set("v.AccListFromEvent", ListOfAcc);
    }
})

Please check below post

Please check below post for more detail
Thanks,
Amit Chaudhary

Tuesday 4 September 2018

VS CODE for Salesforce | Visual Studio Code for Salesforce |

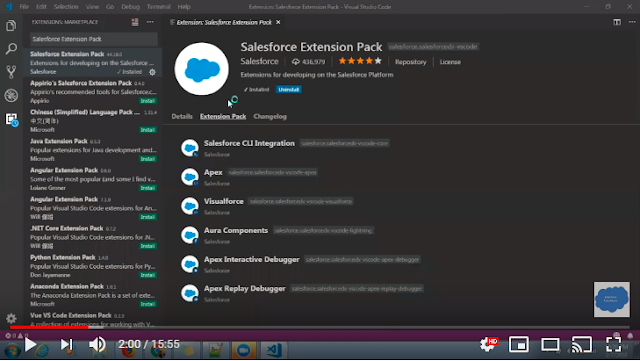
In this post we will talk about how to setup VsCode for salesforce. We can use the VsCode with ForceCode Extensions or with SalesforceDx. If you want to learn about SalesforceDX for Non-Scratch Org check this post.

Option 1) VsCode With SalesforceDX :-

 If you want to setup VsCode with salesforceDx. Check this recording.

https://www.youtube.com/watch?v=7qR0c8h5cCU

After watching above recording you will able to perform below activity.
  1. Install VsCode from here.
  2. Install Salesforce Extension 
  3. Create project with non Scratch Org
  4. How to create Apex Class
  5. Execute Test Class
    • To retrieve code coverage results when you run Apex tests, edit your workspace settings and set  salesforcedx-vscode-core.retrieve-test-code-coverage to true.
  6. Execute Anonymous Apex with Editor Contents
  7. Execute SOQL
  8. Debug log in VsCode


Option 2) Setup VS Code with ForceCode Extension :-

Step 1) Install VsCode. Click here to download.(Please use 1.24 version)
Step 2) Install SFDC CLI   https://developer.salesforce.com/tools/sfdxcli


Step 3) Install the Salesforce Extension for VS Code. and "ForceCode" Extensions.


Step 3) Restart the VS Code.
Step 4) Click on File --> Open Folder--> Select your folder which you want to use.


Step 5) Press "CTL+SHIFT+P" then Type "ForceCode Menu"


Step 6) Enter User Name and password.


Step 7) Then Import the project by "Get All Files from org" or "Package.xml" option


Reference Link :-
1) https://developer.salesforce.com/blogs/2018/02/salesforce-extensions-vs-code.html


Thanks,
Amit Chaudhary
Capture.JPG  @amit_sfdc    #SalesforceApexHours    @ApexHours
  Salesforce Apex Hours